
Birding is TONS of fun for those who love animals and spending time in nature. Here are our tips for getting started with your birdwatching endeavors!
This post contains affiliate links for which Expedition Wildlife may receive a commission (where applicable) at no additional cost to you.
Birding can be done anywhere. You can find all kinds of species in your local park, forest, and even in your own backyard, so getting started is made easy by the fact that birds are all over.
People of all ages can enjoy seeking out the birds in their region, watching them in their natural habitat, and enjoying the songs they have to offer. Much can be learned from where they roost, how they fly, and what they sing.

Did you know the endearing nickname for Yellow-rumped Warblers is “butterbutt,” for their yellow marking on their rump? Photo by Nathan Rolls
Download our FREE guide about how to identify birds!
1. Know the Terminology
There are words in the birding world that you might not find elsewhere, or that have a different meaning based on the context. Here are some you’ll commonly hear or read as you pursue birding.
Birder – n. An individual who identifies and studies birds in their natural habitat (i.e., birdwatcher).
Birding – v. The observation of wild birds in their natural habitats for recreation (i.e., birdwatching).
Pish – v. The sound made by birders to recreate alarm calls in hopes of attracting hidden birds.
Flush – v. To startle a bird into flight.
Fallout – n. A rare occurrence in which migrating birds are forced to the ground by bad weather and may group together in large numbers.
Flyway – n. The route used by migratory birds between breeding and wintering regions.
Life list – n. A list of all the bird species a birder has ever seen or heard.
Lifer – n. The first sighting of a bird by a birder.
Warbler Neck – n. A sore neck caused by observing warblers and other species out of one’s normal range of motion.
There are many more terms used by birders that likely aren’t used much or similar elsewhere, but these will get you started!
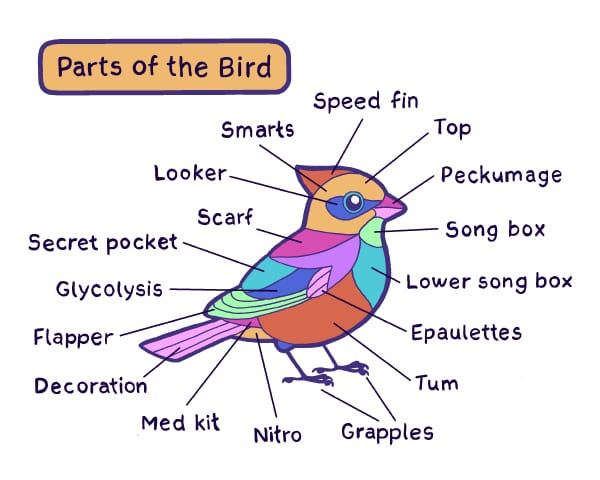
While these aren’t actual names for the parts of the bird (designed by the talented Bird and Moon Comics), the actual birding terms are pretty silly, too! Image by Bird and Moon Comics
2. Get the Right Gear
One of my favorite things about bird watching is that you don’t need much to get started or even to become a proficient birder. Ultimately, the critical tools you’ll need at your disposal are:
– A Pair of Binoculars
– A Field Guide
Frankly, this is all you would truly need to get started. Arguably, I would add that an observation notebook (preferably a small Rite-in-the-Rain) and a good birding hat (I love a good baseball cap) should go out on every trip with you as well. Let’s take a look at the first two components.
Binoculars
A good pair of binoculars can get you a long way to satisfaction in your birding goals, especially if you plan to identify birds well.
Nikon Monarchs are my favorite pair of binoculars, and the price point is great for long-lasting and high-quality glass.
When first starting out, you don’t have to spend a ton of money; however, there is a serious difference between a cheap pair of binoculars and a high-end pair. Very cheap binoculars can lead to missed birds as well as eye strain caused by blurred (or uncrisp) images.
At the very least, keep these two points in mind:
- Make sure your binoculars have a magnification of at least 7-power. This is the first number that describes a pair of binoculars (e.g., 7×35).
- Make sure the lens diameter is at least five times that of the power (e.g., 7×35; the second number).
Try out different kinds of binoculars to see which fit your hands best and are a comfortable weight for you to handle for long periods of time.

Watching birds with my trusty Nikon Monarchs. Photo by Nathan Rolls
Field Guide
These handy identification books provide all of the information you need to know to properly identify birds while in the field.
When deciding on a first field guide, consider purchasing one that uses drawings and paintings rather than photos of birds. This allows you to see all possible plumage variations and markings the bird may have.
For North America, we love the Sibley Field Guide to Eastern (or Western) Birds. Smaller guides focused on your primary locality will not overwhelm you as easily during ID.
For guides covering other parts of the world, Princeton Field Guides has an extensive suite of well-made and organized bird guides. Take the guide to birds of Southeast Asia, the guide to birds of Europe, and the guide to birds of East Africa, for example. We LOVE these guides and they always go in our pack to these destinations. And yes, we have them all.
After you have found your guide book, read through the guide to better understand its organization and the identification components covered.
Phone Apps
There are now a number of great phone apps for identifying birds. The top one currently available is the Merlin Bird ID app, which is completely free and offers downloadable bird packages for regions around the world.
Keep in mind that these apps take up a lot of space on your phone. And, wouldn’t it be nice to put the phone away for a while?
3. Take a Page from your [Guide] Book
Field guides carry a ton of information about the birds found in their subject locality, including the key components you need to know to identify a bird properly.
First, during the perusal of your ID guide, note that the book’s organization is likely in phylogenetic order, meaning birds are ordered in the book based on their evolutionary history.
All birds in the Sparrow family, for example, are listed in the same place in the book (in the last quarter of the guide, typically). So, individual species (e.g., Field Sparrow) are the lowest classification level, followed by genera (sets of similar species), which are further grouped into a family (e.g., Sparrows).
Recognize where in your guide these different families are located to make finding them for ID purposes in the field that much easier. If the guide is new to you, add small sticky tabs to the first page of the common families you search for when you reach for your guide.
Next, look at the characteristics noted for each species. You’ll see species name, habitat type, a geographic map, the sounds they make, and descriptive information such as colors, markings, and overall shape.
Understanding the shape of the bird you are seeing in a particular habitat can help you narrow down the species you might be seeing in the field.

Here’s what the pages in a Sibley guide will look like! Photo by Christa Rolls
4. Be Prepared Before Venturing Somewhere New
If you’re unsure of the bird species you might find in a particular area, and to avoid overwhelming yourself, print out a checklist of the potential birds you could find at that location.
See whether a park or reserve checklist is available online, or go to ebird.com/hotspots and see if there is a checklist entered for a location near your prospective birding destination.
To improve your ability to see more birds at once, and optimize what you’re seeing, know and understand bird ecology and where the best places are to see birds in your area.
Check out our Birding Destination Guide for more information on this particular topic!
Time of Day Matters
Note that the best time to see birds is typically earlier in the morning and, sometimes, later in the evening, unless the bird is nocturnal (e.g., Owls).
Season Matters
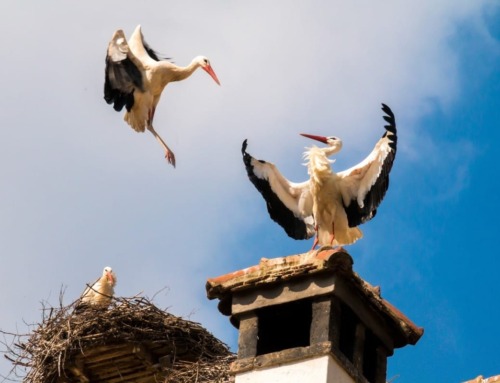
The season is also important, whereby spring and autumn migration are some of the best times to spot birds stopping over on their journey north or south.
Birds can be found everywhere, even in small numbers and in the middle of winter.
As always, don’t forget to bring your binoculars and field guide along with you wherever you go!

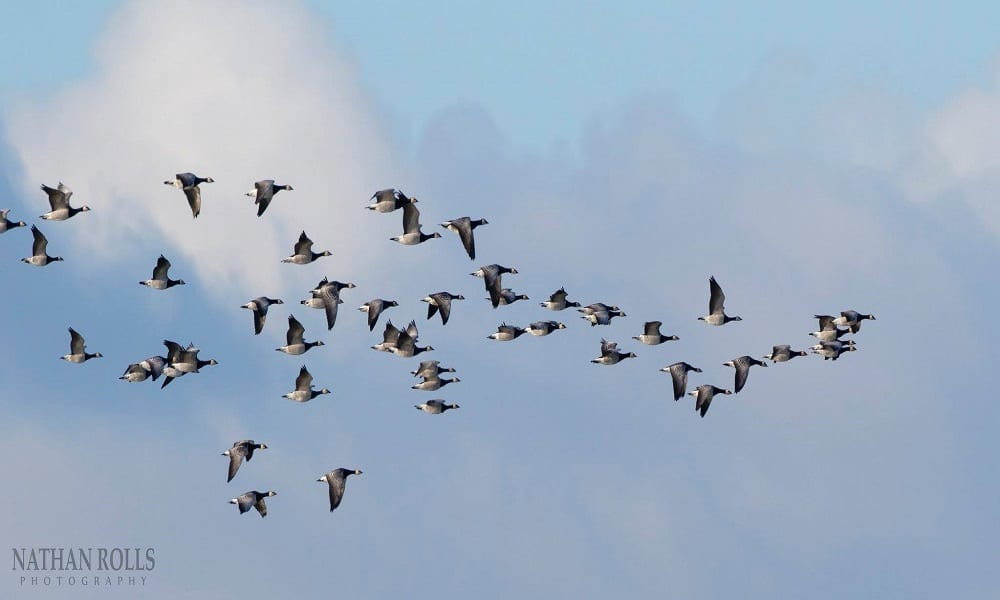
Migration is a GREAT time to see loads of birds, and makes for a really fun birding trip. Photo by Nathan Rolls
5. Patience is Key
Learning birds takes time.
There are over 10,000 species of birds in the world, all of which have unique characteristics, including how they look, where they live, and what they sound like.
So, give yourself a break and be patient with the process.
Start small and with the most obvious birds right where you live, and work your way from there.
If you’d like to progress your skills in bird watching identification exponentially, check out the Thayer Birding Software for birds in North America.
Enjoy the time you are spending outside, and don’t get too wrapped up with finding more species than your last visit, for example. Birding is meant to be fun first and foremost, even if proficiency takes time.
Birds are wild animals, and they’re unpredictable. Some days you may go outside hoping to see certain birds, and it just doesn’t happen.
If you keep at building your skills and your list, you’ll continue to grow your life list no matter what.
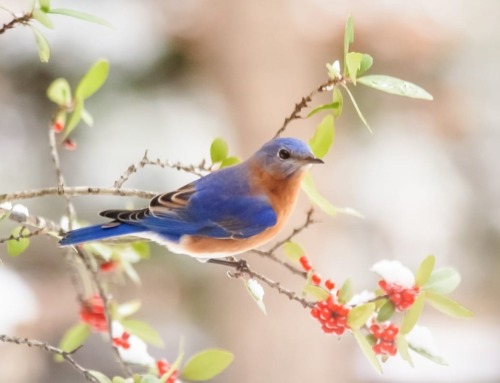
Even being able to identify the birds you see at your backyard feeder is a huge accomplishment. Start there! Photo from Pixabay
6. Seek Help and Community from Others
**We know this is a challenging time to have in-person community events, but you can still connect with your local Audubon group on Facebook, for example for a sense of community.**
We are fortunate to have the internet so widely available to us. It’s even easier now to find birding groups interested in going out on field trips to bird watch together. Birders tend to be open to birding with others, as well as helping out new people to the sport.
Check out your local nature reserve, state or national park, Audubon Society, or Birding Pal to get connected with other birders in your area.
Often, birding with others teaches us things we didn’t know before, especially if those other people know of great birdwatching spots, have picked up helpful techniques, or are keyed into birds you might not yet know.
Try out a birding trip or tour, typically led by park rangers or birding clubs.
The Audubon Society is a reliable source for trips in North America, and BirdLife International, Bird Watcher’s Digest, and Fat Birder are resources for more international trips and birding information.
7. Practice Your Birding Skills
Practice using your binoculars
You’ll need to spend time developing your hand-eye coordination to spot birds through your lenses quickly.
The secret? Spot a bird using just your eyes, then put the binoculars to your eyes without taking your eyes off the bird.
This technique takes time, especially with small, flitty birds, such as warblers, but practice will allow you to get birds in your field of view in no time.
Practice using your field guide
Know your field guide, including where species and families are located in the guide.
It’s beneficial to work on a plan of action for pulling out your guide while in the field – some people hand-carry the book and throw it to the ground when they need to use their binoculars; others might carry a birding vest or cross-body bag to store their gear.

Some birds might require a second look if their characteristics are slightly off from what we typically train ourselves. Do you know what bird this is? Photo by Nathan Rolls
Practice your identification skills
Remember, your field guide has all of the components you need to know to identify a bird properly. Supplementing a field guide with a birding app or the Thayer Birding Software to listen to bird sounds will further help with raising your skill.
Start small, such as with the birds in your backyard or neighborhood. Consider focusing on larger, more obvious birds, such as corvids (i.e., jays and crows) or waterfowl, or common backyard birds.
8. Always Practice Good Birding Etiquette
Every time you watch birds, make sure you’re using ethical behavior to keep you and birds safe.
The top things to keep in mind are:
- Keep your distance from animals to avoid changing their behavior.
- Sparingly use audio cues to attract birds.
- Don’t feed wildlife (unless you have a designated bird feeder).
- Leave nature as you found it.
Overall, be a good influence on new birders and non-birders around you!
Read more about ethical wildlife watching in our post about how to watch wildlife ethically!
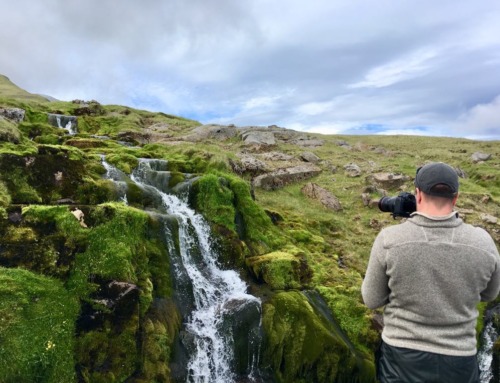
9. Don’t Be Afraid to Get a Little Dirty
Venturing outdoors and watching birds in different habitats can be so rewarding, especially to fulfill our quest for knowledge about these stunning and interesting animals.
In some birding situations, it will be beneficial to get lower to the ground to avoid scaring skittish birds. This is especially true in environments where it’s not as easy to hide behind vegetation or a blind, such as on beaches or in steppe habitats.
Keep in mind to avoid trampling the vegetation in the process.
But, be prepared with the right gear.
Layers, sun protection, and rain gear can go a long way to having an enjoyable experience when out birding.

This trip to the Camargue in Southern France certainly called for plenty of sun protection and bug spray! Photo by Nathan Rolls
Beware as you start birding more and more — you’ll find yourself paying much more attention to the natural world around you, including the sounds floating through the air and flitting movements made in trees or pastures.
While beginning birders may be daunted by the task of learning and identifying new birds, there are some things you can do, get, and keep in mind to make your journey that much more fun and easy.
We are so excited about your foray into the birding world! Have any questions about getting started? Let us know or send us a message!
Happy birding!
Christa and Nathan


Leave A Comment