
What goes into making a wildlife film? Keep reading to find out…
This post contains affiliate links for which Expedition Wildlife may receive a commission (where applicable) at no additional cost to you.
Films are our method of providing a window into the wonderful places that people can experience in the world.
They are poetry for the eyes, inspiring thoughts of wanderlust for those dreaming to be transported to another place.
That poetry can take quite a bit of time and pre-planning. And a little self-introspection, too.
From planning the destination to getting the gear (and the financial commitment that goes with it), if you’re considering making wildlife films, there’s no day like today to start.
Filming wildlife can be for anyone!
Here is what goes into the making of our wildlife films. Not only does it give us great joy to capture these pieces, but it’s also our passion to bring to life the incredible places we’ve been fortunate enough to visit.
Visit Nathan Rolls Photography on YouTube to see our latest wildlife film and adventure!
1. Plan the Wildlife Film Destination
Ask yourself the following questions about your filming location:
- What animals are on my must-see list? Where are they located?
- Is it the right time of year to visit this location to see the animals I hope to see?
- Do I know the specific locations at that destination to film wildlife? Or, have I corresponded with experts ahead of time to know where to go?
- Is it required for me to have a guide to access my desired destination?
Read more on selecting a birding travel destination with our Bird Watching Destination Guide
Hours of time can go into answering these questions. However, once you’re there, you’ll be spending more time getting optimal footage rather than trying to troubleshoot through these questions.
Essentially, spending time and energy before the film day will save you time and energy at your destination when your time is potentially more limited.
Even if we know a place has cool birds or other wildlife, we coordinate with locals and experts in the area beforehand to figure out the best time of year to visit.
The trip wouldn’t be totally lost, but if the purpose would be getting great Puffin footage, for example, it would be a bummer if the Puffins had already left for the season.
To elaborate further on the last question, whether you need a guide, consider these points.

Seeing foxes in Hornstrandir Nature Reserve would have been much more challenging without working alongside the experts who knew where and how to find them. Photo by Nathan Rolls
Without a Guide:
If traveling on your own without a guide, the key is making sure your destination is accessible and easy to experience on your own.
- Determine whether there are access issues, requiring you to obtain a guide to capture what you want to see.
- Even if a guide is not necessary, is the area easy to navigate?
- Do you know the specific areas where to find what you’re looking for?
- Do you know the local laws and regulations possibly present in the area you want to access?
Consider all of these points in your planning process, as they can make or break your trip and the footage you obtain.
With a Guide:
Guides, in many cases, seriously increase the chance of getting those shots you most desire.
Our wildlife film of Tanzania wouldn’t have been quite as epic without our guide, Josh, from The Wild Source!
Where logistically and financially possible, we recommend having a private or small-group guide that is willing and able to show you the best places to see what you’re interested in seeing.
For some locations, having a local expert is either required or necessary.
Always select a guide that has a good reputation for ethical practices. This includes remaining a good distance from the wildlife, reducing negative human footprint, and not interacting with the wildlife directly.
Guides can help with access to certain locations, such as those that specifically require the presence of a guide to access restricted areas.
They also have the insider knowledge and know-how to navigate to the best spots to see wildlife.
Keep in mind that wild places aren’t zoos and nothing is ever guaranteed, but these knowledgeable individuals are so helpful with increasing your chances.
READ NEXT | Photography Tips for Wildlife Photographers. The same concepts apply to filmmaking!
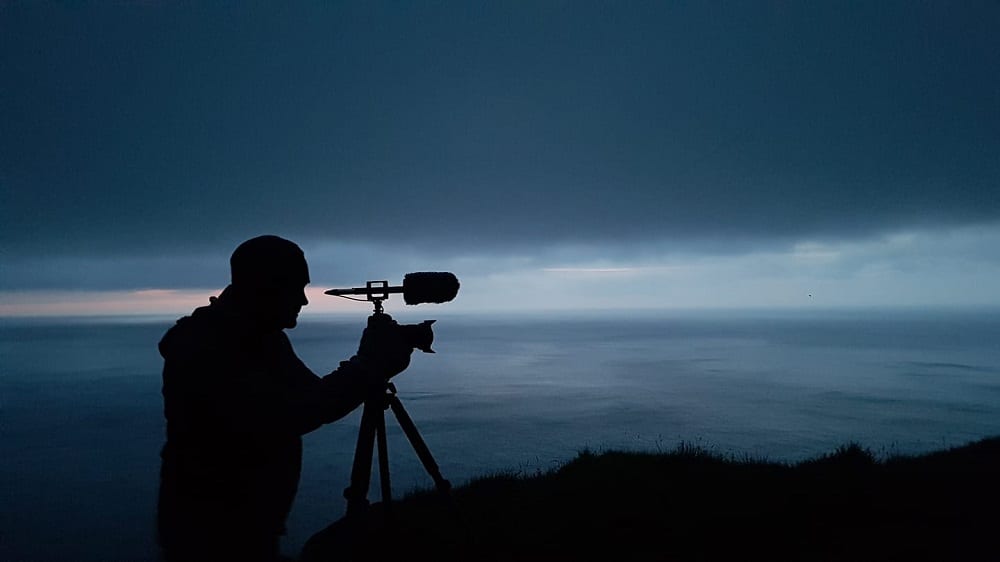
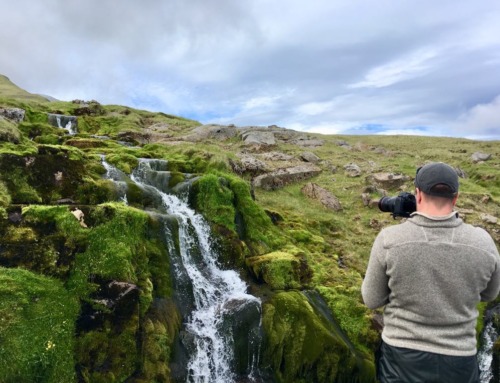
2. Get the Gear for Filming Wildlife
Videography gear takes a long time to collect if you’re on a limited budget.
It’s taken us years to acquire the equipment we now have. We have either slowly put money aside into a photography/videography fund or sought out used equipment online.
The following is the list of gear that always makes its way into our pack when we go on a filmmaking trip.
Digital Camera
We specifically use a Canon 5D Mark IV. However, there are numerous other options (including other DSLRs and Mirrorless cameras), depending on your budget and needs.
Camera Lenses
At a minimum, we recommend a wide-angle lens and a telephoto lens.
We generally bring a 24-70mm, 70-200mm, and 500mm on our trips to give us the widest variety of prospective options.
A Sturdy Tripod with Fluid-head
When filming, we always bring our Manfrotto Fluid-head along with our Gitzo tripod. Using a camera stabilizer, or a hand-held gimble, can also give more fluid-motion shots.
Loads of memory cards, batteries, and external hard drives
Of course, footage takes up a lot of memory card space. We keep four extra camera batteries and two charging systems available during our filming trips.
Consider whether you want to bring along a method of backing up your external hard drives on your trip.
We always bring along our Windows tablet to back everything up on external hard drives.
Gear maintenance and cleaning kit
Have a method for maintaining and cleaning your gear on the road. Particularly if you are visiting a location with sand or loose soil, this is an essential item.
Cleaning your gear regularly (both lens and camera body) will mitigate wear on your gear as well as reduce the possibility of particles showing up on your footage!
Gear Pack
It’s overwhelming how many camera gear packs are on the market. Here are our two favorites:
Manfrotto mini pack – the perfect size for smaller jaunts and popping your smaller lenses and accessories into.
Atlas pack – our go-to for all excursions. Removable hiking strap, customizable inside padding, rainfly, you name it. We love this pack.

Having a good, reliable gear pack to allow you to carry what you need, when you need it is important. Here, Nathan films Langurs in Thailand. Photo by Christa Rolls
GoPro
In addition to the other wildlife footage you take with your camera, a GoPro can be another fun way to capture the experience.
Film yourself. Film your surroundings. It adds some nice dimension.
Don’t want to mess around with a large gimble for your DSLR or mirrorless camera? There are stabilizers specifically made for GoPro and similarly-sized devices (e.g., cell phone).
New models of the GoPro have 4K capabilities, so you won’t be disappointed with the quality. This is really a matter of what you’re looking for in your filming style.
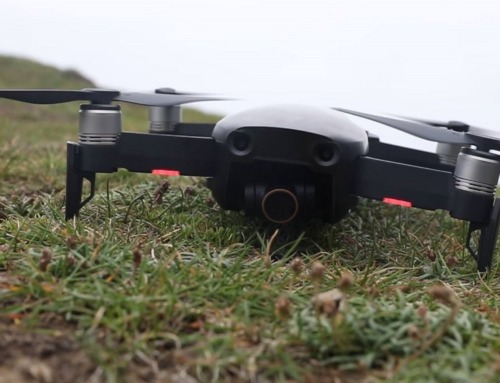
Drone
Drones offer a wonderful perspective on the surrounding landscape in which you’re filming.
It’s great to get up-close shots of animals on your camera, but having the perspective of where that animal is found adds intrigue and variety to your film.
Of course, if you’re ever using a drone around wildlife, please do so responsibly! DO NOT fly your drone up to wildlife.
READ NEXT | How to avoid conflict when using a drone around wildlife
Drone types can be anything from the portable Mavic Mini, starting at $399, to the more substantial Mavic 2, starting at $1,599. We personally recommend DJI because they’re the drones we use, love, and recommend.


The bottom line for gear
Although filming for certain effects or to accommodate harder-to-capture wildlife can require specialized pieces of equipment that are higher end, it’s a misconception that you need the best of the best gear to get good, quality footage.
Good quality footage comes from honing your filming composition and technical skills.
If you plan on investing a lot of your time into filming, it may be worth it to subsequently invest in higher quality gear that will allow you to take your skills to the next level.
If you want high-quality footage, you’ll need to invest in the gear that allows for that standard.
For example, our first drone was the DJI Mavic Air. This drone is great for traveling, creates good quality footage (including 4K capabilities), and is considered an excellent entry-range drone.
Having the DJI Mavic Air allowed us to travel easily with the system setup and hone our flying and filming skills, especially since it’s so user-friendly.
3. Know your Gear and How to Use it
This may seem like an obvious point, but you’d be surprised how many people ask us how to use their camera when we visit wildlife hotspots.
Many camera stores now rent out different kinds of equipment, which is wonderful if you want to have something new to bring along on your awesome trip.
The only trouble with this is that you might not necessarily know the gear well before you take it in the field.
Whether you’re bringing gear out for the first time or not, you need to know how to use it. Otherwise, you have the chance of missing that shot and being disappointed.
4. Plan and Execute the Shots
Once you’ve planned out your destination and where you want to go, you probably have a pretty good idea of the animals and landscapes you want to capture.
Write down ahead of time the shots you don’t want to miss.
Note whether to include:
- Close-ups of wildlife
- Perspective shots of the animal in its habitat
- Habitat-only footage
- Close-ups of habitat features, such as greenery
Some shots are so unique that you can’t plan them at all.
After coming across the beautiful and unique oak leaf moth, Nathan decided to pan-up the side of the tree trunk to capture its beauty along the edge of the tree. There’s no way we could have planned for it to start undulating up and down at the *exact* moment the pan hit him.
Additionally, knowing the equipment you have available to you is important to determine the kinds of shots you’ll take.
For example, here are some shots you can consider, and the equipment you’ll need to achieve them.
Panning
A panning shot is a good way to showcase the surrounding landscape, for example.
Smooth panning in films can be achieved with a good fluid-head on your tripod or using a gimble. If you don’t use these items, you might get a bit of shake, which can sometimes be remedied in post-processing.
Alternatively, you can post-process a static film shot to pan up, down, left, or right.
Time-Lapse
If you want to capture a changing element over time, time-lapse is the way to go. Time-lapse footage is actually a compilation of many images strung together. The shorter the time between photos, the smoother the time-lapse.
This also means you’ll be taking many, large photos, so consider this in how many memory cards you bring.
Practice time-lapse ahead of time if this is a shot you want to achieve in your wildlife film.
You’ll need a sturdy tripod, or spot to leave your camera undisturbed, and time.
Aerial
If you plan to capture aerial footage for your wildlife film, check the drone laws and regulations for your destination well ahead of time.
Certain regions or countries may require a fairly arduous permitting process to get permission to fly.
5. Select Music for your Film
Our songs have all come from various royalty-free music sites, including Ben Sound, Premium Beat, and Musicbed.
Why royalty-free?
When spending so much time making a video, we want the freedom to allow that video to go where we want it to without the worry of copyright concerns down the road.
We’ve purchased the music rights for the songs we’ve used for this purpose. Songs range anywhere from $30-60 for the rights to use in videos posted on YouTube. Commercial rights will have higher pricing.
Get a feel for the music
It’s important to note here that everyone has their tastes and signatures.
Nathan leans more toward orchestral pieces that build up into an epic climax, without too much base. But, ultimately, it depends on the feel of the video you’re trying to create.
In our wildlife film of the Camargue, we wanted something fun and playful.
For our Faroe Islands video, we consulted with the wonderful techs at musicbed.com, who will send recommendations based on criteria you’re looking for in a song.

Collect sound effects while you’re at your destination, or you can download sound effects once you’re post-processing your video. Photo by Christa Rolls
6. Post-processing and Editing
Select an Editing Software
There are free software tools available for Windows and Mac that allow you to piece a video together. This might be something fun to play around with as you first begin experimenting with making videos.
For more extensive post-processing and editing capabilities, allowing more customized effects and editing tools, you will need a paid product.
Just as with any piece of gear, you’ll need to spend time learning how to use the software to its full potential. This will help to make your life easier as you’re navigating the editing process.
Free
For just starting out, OpenShot is a drag-and-drop video editing software that includes transitions and video effects. iMovie, for Mac users, comes pre-installed on Macs and is a good starting point.
HitFilm Express is a free tool that has loads of post-processing capabilities.
DaVinci Resolve is another free tool that has a more complicated platform than HitFilm, but is closer in format to the professional-grade software platforms.
Paid
Adobe Premiere Pro is a powerful video and sound editing software available to Mac and Windows users.
- We personally use Premiere Pro and love the capabilities it has. Just know your computer will need around 8GB of RAM to run the program and there is a pretty steep learning curve to get acquainted with the interface.
Final Cut Pro is an easy-to-use, powerful, Mac-only post-production software.
Edit your footage
While the #nofilter movement makes people wary of using editing tools to enhance their photos or footage, remember that the process of developing old-school film itself is post-processing.
In traditional film editing, you must :
- Determine how long you want the image to sit in the developing solution to develop the image.
- Expose the image to certain amounts of light to determine the exposure.
- Crop the image to re-compose the image in a way that’s suitable for you.
Software platforms only assist you in making these adjustments digitally.
What’s more, every artist has their signature look. This means some might prefer a more exposed look that gives a white-washed effect to the image. Others might select a more contrasted look to create a more dramatic effect.
Find the look you prefer and play with settings to convey the image you desire.
This isn’t to say that you’ll supplement software for learning how to use your gear, but don’t be afraid to do some post-processing to take your image to the next level.
Organize the Film Clips
Where in your music are there lulls in the music or crescendos?
These may be points in your organization where you can make a dramatic entry of a particularly significant piece of footage you’d like to highlight.
Get creative with varying perspectives to bring your viewers right there with you.
Are you interested in learning more about wildlife films? Have you created a wildlife film of your own? Let us know in the comments!
Happy Filming!
Christa and Nathan

Leave A Comment